


4 Seater Tan Leather Sofa Tools To Make Your Daily Lifethe One 4 Seate…
페이지 정보
작성자 Donte 댓글 0건 조회 9회 작성일 25-01-04 00:58필드값 출력
본문
 A 4 Seater Tan Leather Sofa Adds Timeless Style and Durability
Add timeless style and durability to your living area with this leather sofa. It features a sturdy warp-resistant birch wood frame and a customizable design with seven base configurations with a variety of colors, leg options and colors. The smooth, full-grain leather reveals natural marks, scratches and healing scars for an incredibly unique style.
Product Features
If you're looking for a leather sofa that has a sleek look that's also robust, this 4 Seater Sofa Leather is a great option. The top-grain leather is stain-resistant and fade-resistant, while its tightly woven frame can stand up to accidental spills. You can use a damp cloth or a leather conditioner and cleaner to restore its appearance.
This leather sofa in tan has a clean and classic silhouette that is stunning in any color palette or style of decor. The seat cushions are tufted and feature pockets and foam springs to provide a comfy sitting experience. The frame is made of wood that has been kiln dried and glued, double-doweled, and corner-blocked joints to ensure durability. The frame is also designed with hidden cushion tie-downs to keep them in place.
Like all genuine leather, this sofa has a natural look with natural hallmarks like fat wrinkles and healed marks. This gives the couch a unique, luxurious appearance that softens over time, giving it a more attractive appearance. It's also naturally anti-bacterial and resistant to stains, water marks, mildew and mold. This model comes in three color options which include deep tan neutral taupe and dark brown.
You can stop slippage by using pillows with a slight shine or texture. You can also use a blanket to cover the couch, or even tuck it between cushions. You can also spray a non-slip spray onto the back of a pillow or blanket.
This leather sofa in tan is a bit pricey however it's worth it because of its elegant design and high-end construction. Its top-grain leather, which is durable, is a deep neutral shade that works well with any color scheme, and it's easy to clean and maintain. The frame is sturdy and sturdy and the seat cushion is constructed of foam and feathers to provide a comfortable and supportive experience.
If you're looking for a leather sofa in tan with endless options for customization this sofa is the perfect choice. The site's customizable features let you pick between seven base configurations with 20 colors, as well as a leg types, as well as an array of additional furniture like an ottoman or moveable chaise. The site's easy-to-use interface makes it easy to design the look you want.
Product Options
In addition to the color, the kind of leather you choose can also affect the comfort of your 4 Seater Sofa Leather and its durability. Certain types of leather, such as top-grain and full-grain leather are much more durable than others, like split-grain or the bonded 4 seater white leather sofa. Bonded leather is a mixture of less-quality leather and other materials, such as polyester or fabric. It is less expensive than genuine leather, however it is less durable.
The cheapest leather couches are usually made of split-grain or bonded leather and don't have as many features as expensive genuine leather sofas. The final decision will be based on your budget and style preferences.
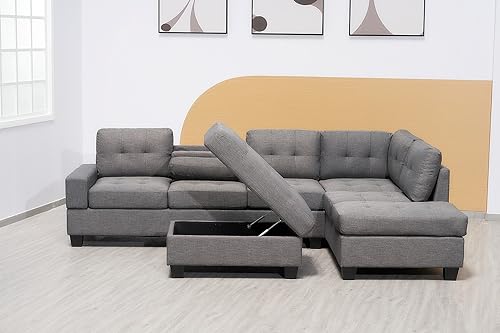
If you love the look of a leather couch but need something more affordable think about alternatives with a tan-colored finish such as this sectional in tan leather from Article. This piece's high-quality construction, customizable features, and timeless style make it well worth the cost. You can change the number of seats and size of each seat as well as the arm configuration and leg material. The sofa also comes with a storage ottoman and bolster pillows.
The Castlery Jonathan Leather sofa from Pottery Barn is another option for a 4 seater leather sofa recliner couch that's affordable. The sofa is on the pricier side, but it offers many options for customization and a strong frame made of birch that will last for many years to be. You can pick from seven bases and colors, as well as a variety of leg types.
In addition to color, the kind of leather you choose will affect the sofa's comfort and maintenance needs. For example, full-grain and top-grain genuine leathers have a soft texture, with a natural patina that develops over time. These leathers are less likely to scratch or scratch however they do require regular cleaning and wiping with a damp cloth or commercial leather cleaner.
Certain leathers are more sensitive than others. This is why you should avoid leather couches in areas that receive direct sunlight. If you also blankets or throw pillows over your couch, make sure the fabrics are textured to avoid slipping.
Product Warranty
Most couches come with some kind of warranty, however the specific terms differ. The first category of warranties guarantees the frame of the sofa and spring support systems against structural problems or manufacturer defects for a set amount of time. The second type of warranties covers workmanship on the material, such as stitching seams and upholstery seams as well as button tufting and cushion zippers. These are typically covered for a year.
A good warranty should cover damage caused by a defect in the manufacturing process for example, a broken spring or frame, and also provide repair or replacement of the damaged section of the sofa. If you have any questions about the warranty, it's best to ask the retailer or the manufacturer. Consider a furniture protection plan, which offers extra assurance for items that aren't covered by the standard warranty.
 You will get the most value from your new couch by knowing how to claim. The process is different from company to company. However you should contact a manufacturer or retailer and provide proof of your purchase, a detailed description of the problem, and photographs or other evidence. This will allow them to swiftly address any issues that you may have regarding your couch. Some manufacturers and retailers offer extended warranties that cover things way outside the realm of normal wear and tear, like cushions that lose their firmness over time. They may be offered at an additional price, but they can add real value to your furniture investment. A good warranty is a guarantee of trust by the manufacturer and will give you peace of mind.